Keeping your home in good shape doesn’t have to feel like a big project. Most of the time, it’s the small fixes that make the biggest difference—those simple updates that stop leaks, keep things looking neat, and prevent bigger problems later. One of those often-ignored items is the rubber strip for bottom of shower screen.
It seems like a tiny part of your bathroom, but it plays a major role in keeping your space dry, clean, and functioning properly. If it’s cracked, worn, mouldy, or falling off, it can quickly lead to puddles on the floor, slippery tiles, damp patches, and damage to the flooring around the shower.
In this guide, we’ll walk through everything you need to know—from what these rubber strips actually do, to how to choose the right one, to where you can find the most reliable options in the UK. This isn’t just a shopping guide; it’s a complete home maintenance checklist for keeping your bathroom in perfect working order.
Why the Shower Screen Seal Matters More Than You Think
It’s easy to overlook something so small, but a shower screen seal has several important jobs:
1. It Prevents Water From Escaping
If water leaks onto your tiles every time you shower, it creates the perfect environment for mould, slippery floors, and even structural damage. A good seal stops drips, splashes, and run-off water.
2. It Keeps the Bathroom Hygienic
Old or broken seals can trap dirt and moisture, creating black mould and unpleasant smells. Replacing it is a quick hygiene upgrade.
3. It Helps Keep the Shower Stable
The strip helps cushion the glass, reducing rattling and keeping everything aligned.
4. It Extends the Life of Your Shower Screen
A screen without a proper seal takes more pressure, moves more, and wears down faster.
Simply replacing this one small part can help protect your bathroom for years.
Signs You Need a New Shower Screen Rubber Strip
Before buying a new one, it’s important to check the condition of your current strip. Look out for:
• Cracks or Splits
If the strip is tearing or peeling, it will no longer hold back water.
• Hard or Brittle Texture
Over time, heat and moisture make the rubber stiff. Once this happens, it won’t sit properly against the floor.
• Mould or Stains You Can’t Remove
Some mould is so deep in the strip that cleaning won’t save it.
• Water Pooling Outside the Shower
The most obvious sign that your seal is no longer doing its job.
• The Strip Keeps Falling Off
This usually means it has lost its grip and needs replacing.
If you notice any of these signs, it’s time to update your shower maintenance checklist.
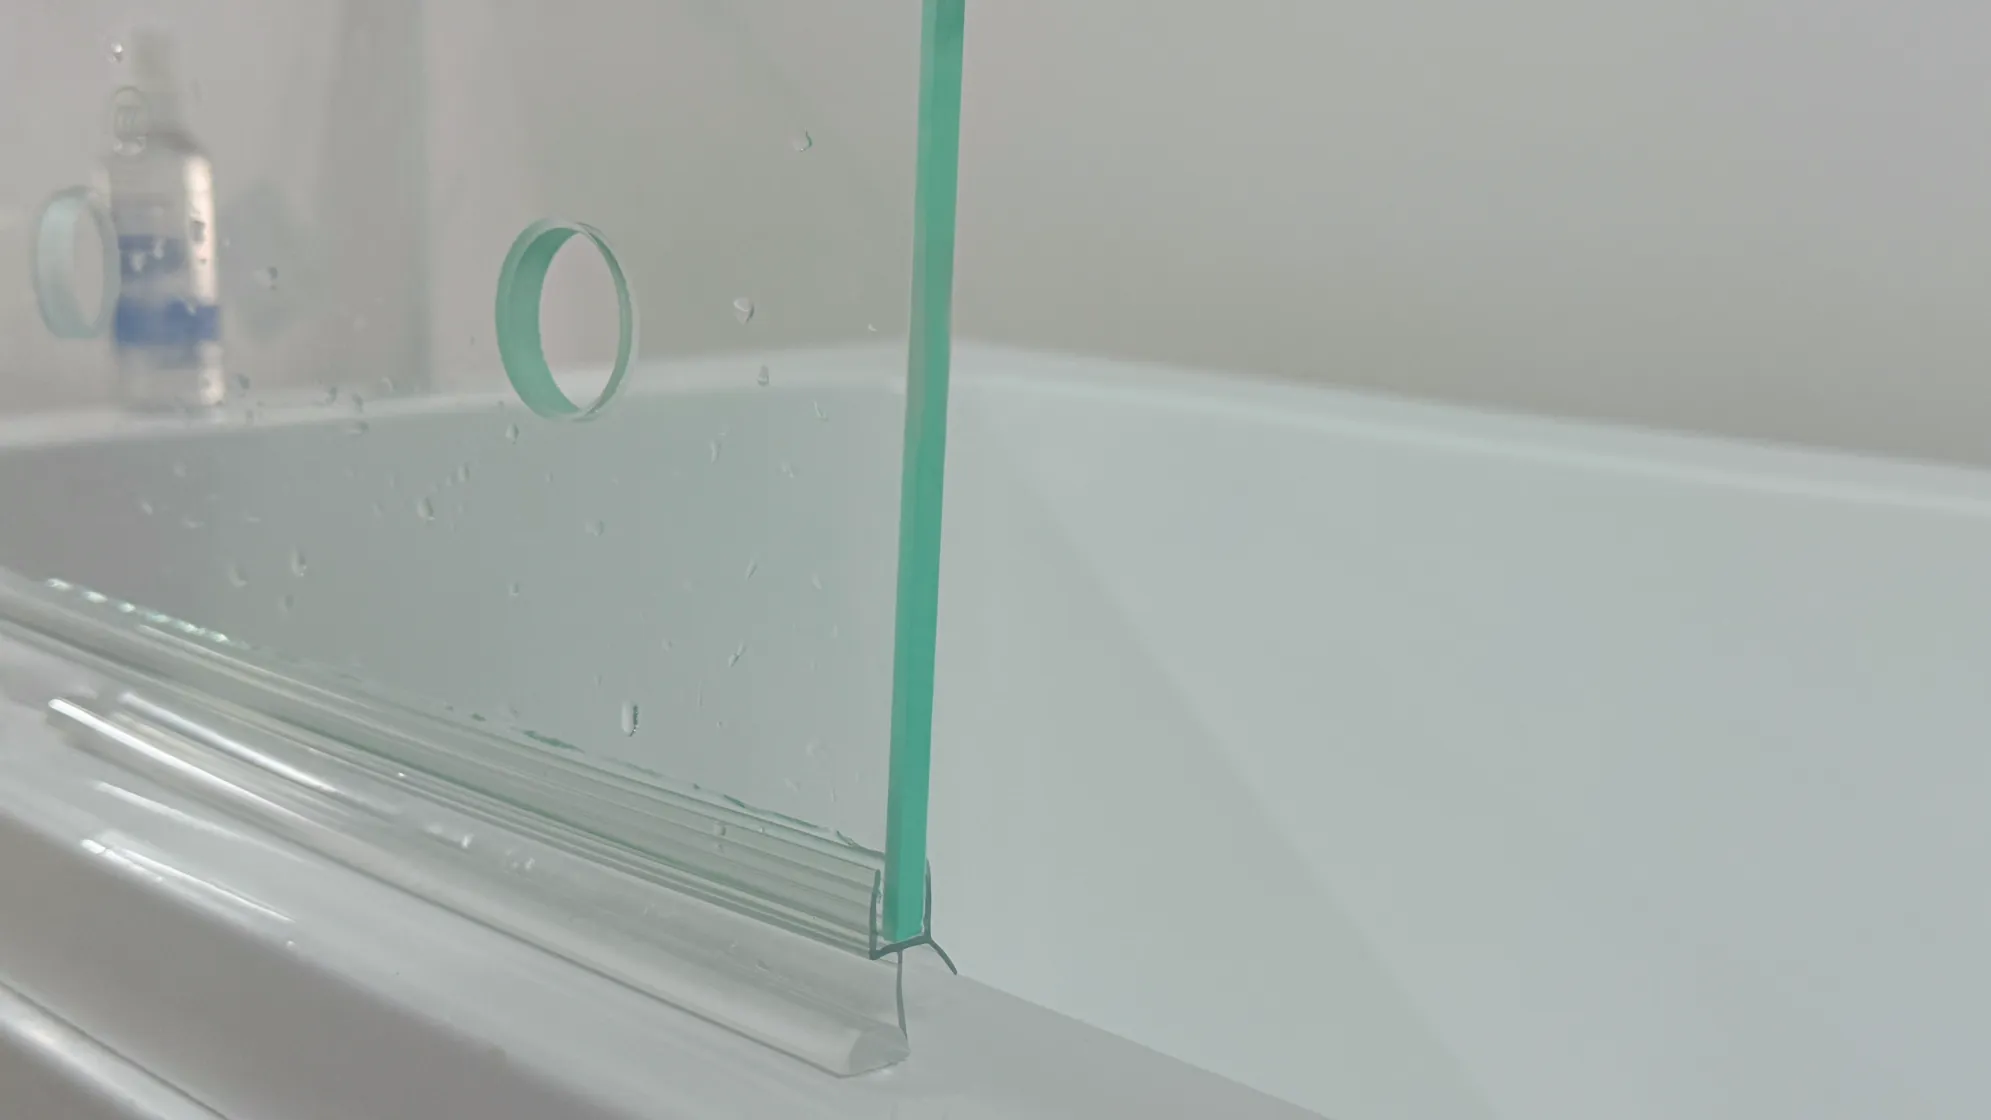
Understanding How Rubber Strips Work
To choose the right option, it helps to understand what these strips actually do.
They Create a Tight Barrier
The strip sits at the bottom edge of the glass and works like a flexible seal. As the door moves, the strip moves with it, keeping a consistent barrier against the floor or shower tray.
They Are Designed for Different Types of Shower Doors
Different showers need different strip styles:
- Pivot doors
- Hinged doors
- Sliding screens
- Curved baths or enclosures
Each type has a specific thickness and fit.
They Are Usually Made From PVC or Silicone
PVC is firm and long-lasting.
Silicone is softer and more flexible.
Both work well—it depends on your preference.
Types of Shower Screen Rubber Strips Available in the UK
Before buying a replacement, you should know which type suits your screen:
1. Straight Bottom Seal
The most common type for standard shower screens.
2. Curved Bottom Seal
Perfect for curved shower doors or quadrant enclosures.
3. Magnetic Seals
Used on the closing edges of some doors—not always needed for the bottom, but good to know.
4. U-Shaped Push-On Strips
These slide directly onto the glass without glue, clips, or screws.
5. Drip Rail Seals
These include a small lip that redirects water downward to stop splashes.
Each design solves a slightly different problem, which is why understanding your screen’s size and shape is important.
How to Measure Your Shower Screen Correctly
Before buying a new strip, you must measure properly. Here’s the easiest way to do it:
Step 1: Measure the Thickness of the Glass
Most UK shower screens are:
- 4mm
- 6mm
- 8mm
- 10mm
The strip must match this thickness exactly.
Step 2: Measure the Length
Use a tape measure to check the length needed so your new strip covers the full width of the screen.
Step 3: Check the Gap Between the Door and the Floor
Some seals are designed for small gaps; others are designed for larger ones.
A mismatched seal will either drag on the floor or fail to block water.
Your UK Bathroom Maintenance Checklist
When you’re updating your shower strip, consider these additional checks to keep your bathroom in top shape:
• Clean the Shower Tray Edges
Make sure there’s no residue where the strip touches the tray.
• Check for Loose Screws or Hinges
A loose door puts extra pressure on the seal.
• Look for Mould Inside the Tracks
A quick anti-mould spray can keep things fresh.
• Reseal Any Gaps With Bathroom Silicone
If the tray or screen has small leaks, silicone sealant helps.
• Wipe Down After Each Shower
This prevents soap build-up and hard water stains.
A little care goes a long way in keeping your bathroom healthy.
How to Install Your New Rubber Strip
Don’t worry—it’s easy and doesn’t require any special tools.
Step 1: Remove the Old Strip
Gently pull it off from one side. Most will slide off without effort.
Step 2: Clean the Glass Edge
Use warm water and mild cleaner to remove dirt and limescale.
Step 3: Fit the New Strip
Push it firmly onto the glass. Make sure it sits evenly along the entire edge.
Step 4: Trim If Necessary
Some strips come slightly longer. Trim the excess with scissors.
Step 5: Test the Door
Open and close the door to make sure it doesn’t drag or shift.
It should sit neatly, with no gaps.
Where to Buy the Best Shower Screen Seals in the UK
There are many options online, but you want a place that offers:
- A wide choice of sizes
- UK-specific shower seal designs
- Fast delivery
- Clear product images
- Durable PVC or silicone
When shopping, look for well-known UK stores that specialise in bathroom replacement parts. These places usually have the widest range and the easiest installation guides.
Features to Look For Before Buying
To make sure you’re getting the best value, pay attention to:
1. Material Quality
High-quality PVC lasts longer, stays flexible, and looks clear rather than cloudy.
2. Easy Installation
Push-on designs save time and effort.
3. Compatibility
Always check the product page to ensure the strip works with your door thickness.
4. Anti-Mould Properties
Some seals are treated to resist mould.
5. Water Direction Lip
A built-in drip lip helps guide water back into the shower tray.
Common Mistakes People Make When Buying Shower Strips
Avoid these issues:
• Choosing the Wrong Thickness
If your glass is 6mm, a 4mm strip will fall off.
• Buying the Wrong Type of Seal
Curved doors need curved seals.
• Measuring Incorrectly
Always measure twice.
• Buying Very Cheap Strips
They discolour quickly and crack within months.
• Ignoring Water Flow Direction
A strip without a drip lip may allow splashing.
Avoiding these mistakes helps you get a long-lasting fix.
Keeping Your New Seal in Good Condition
Once installed, these simple habits will help it last longer:
Wipe It After Every Shower
This stops limescale building up.
Avoid Harsh Chemicals
Bleach can damage the rubber or PVC.
Use a Soft Cloth or Squeegee
These keep the surface clean without scratching.
Ventilate Your Bathroom
A dry room prevents mould.
Replace Every 12–18 Months
Even the best strip will eventually wear out.
Small routines like these keep your bathroom fresher and cleaner.
Why Choosing the Right Strip Saves You Money Long-Term
It might seem like a small purchase, but a strong, durable seal prevents:
- Water damage
- Loose tiles
- Rotting wood
- Floor repairs
- Mould treatment costs
Preventing water leakage is one of the simplest ways to protect your home without spending a lot.
A Practical Example of What Happens When You Ignore a Worn Seal
Imagine this: every time you shower, a tiny amount of water drips out. At first, you barely notice it—just a small puddle near the door. But over weeks and months, that water seeps into the tiles and grout. Eventually, the edges start to darken. The silicone around the tray starts to peel. The wooden skirting near the shower begins to swell.
Suddenly, a £9 strip has turned into:
- £80 for mould removal
- £120 for tile repair
- £60 for replacing skirting
- A general sense of frustration
That’s why replacing the seal isn’t a cosmetic job—it’s a smart home maintenance decision.
How Often Should You Replace It?
Most UK households replace their shower strip every 12 to 18 months. But some situations may require earlier replacement:
- Limescale-heavy water
- Very hot showers
- Older shower screens
- Poor ventilation
Regular checks prevent surprises.
Final Thoughts: Small Fix, Big Difference
A rubber strip for bottom of shower screen might not be the most glamorous home upgrade, but it is definitely one of the most practical. It protects your bathroom, keeps your floor dry, and stops long-term damage. With the right strip, proper measurements, and a quick installation, you can easily give your shower a fresh start.
This simple addition can be the difference between a clean, dry bathroom and one full of leaks and dampness. If you’re building your UK home maintenance checklist, this little part deserves a place near the top.